

Written by me@grafxflow
26 Apr, 2018
0
12,280
For this example I am going through the whole process of creating an app using angular and laravel from the very start of setting up node through to the final CRUD app. The best practise I have found is to keep angular and laravel completely seperate rather than merging them - so angular for the frontend and laravel for the backend rest api calls. Also for this example I will be using MAMP as my localhost testing server environment. This is an epic of a tutorial so put some time aside... but I have tried to make it as detailed as possible.
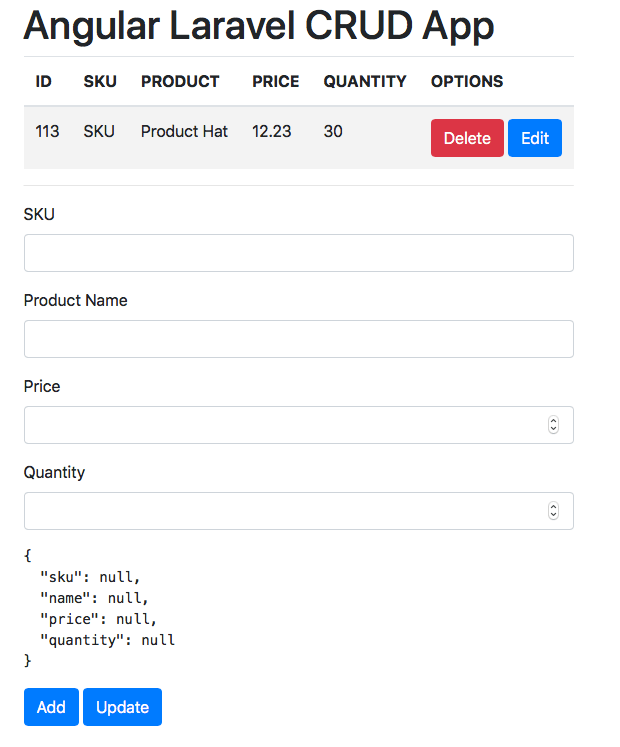
Below is a screengrab of what we will be creating...
First things first, we are going to be using homebrew which makes the installation process much easier plus apple's xcode which adds tools you need to compile software which is free and can be installed via the App Store.
So open the terminal and input the following to install homebrew.
ruby -e "$(curl -fsSL https://raw.githubusercontent.com/Homebrew/install/master/install)"Note: About the above, I noticed an error when using it in macOS Mojava 10.14 so the solution was to use below instead.
/usr/bin/ruby -e "$(curl -fsSL https://raw.githubusercontent.com/Homebrew/install/master/install)"Once done it's also a good idea to let homebrew detect broken installations and update them accordingly such as 'phpunit' and 'ruby'.
brew upgradeNow homebrew is installed lets do the same with node simply by entering.
brew install nodeOnce done check the version.
node -vv10.0.0Now npm should also be installed so check the version of this too.
npm -v5.6.0If at any point you want to update them just use this.
brew upgradeor if you just want to update node only input this.
brew upgrade nodeI have also noticed that homebrew doesn't always upgrade npm to the latest version so you may also need to use npm itself.
npm i -g npmNow with these installed we can start working with the likes of react, angular 2+. For this example I am using angular.
We now need to install Angular CLI globally so input the following.
npm install -g @angular/cliYou can also install older versions such as Angular 2. But I am unsure if this tutorials code will still work for the older versions since I am using Angular 5.
// Angular 2.4.10
npm install -g @angular/cli@1.0.0-rc.1
To update Angular use.
npm install -g upgrade-angularReferenced here - Angular Cli Versions
Unlike all the previous installations we can't check Angulars version just yet, we first need to create an angular app. So choose the directory and create a new app.
cd /Applications/MAMP/htdocs

ng new angular-web
Now we can check the Angular specs and versions.
cd /Applications/MAMP/htdocs/angular-web

ng -v
This is what you should see, so this app is running on Angular 5.2.10.
    _                      _                 ____ _     ___
   / \   _ __   __ _ _   _| | __ _ _ __     / ___| |   |_ _|
  / △ \ | '_ \ / _` | | | | |/ _` | '__|   | |   | |    | |
 / ___ \| | | | (_| | |_| | | (_| | |      | |___| |___ | |
/_/   \_\_| |_|\__, |\__,_|_|\__,_|_|       \____|_____|___|
               |___/

Angular CLI: 1.7.4
Node: 10.0.0
OS: darwin x64
Angular: 5.2.10
... animations, common, compiler, compiler-cli, core, forms
... http, language-service, platform-browser
... platform-browser-dynamic, router

@angular/cli: 1.7.4
@angular-devkit/build-optimizer: 0.3.2
@angular-devkit/core: 0.3.2
@angular-devkit/schematics: 0.3.2
@ngtools/json-schema: 1.2.0
@ngtools/webpack: 1.10.2
@schematics/angular: 0.3.2
@schematics/package-update: 0.3.2
typescript: 2.5.3
webpack: 3.11.0Now it's time to install Laravel but just incase you don't have a 'composer' shortcut setup and installed best to read this article first. So let's create the rest api using 'laravel-api' as the directory.
cd /Applications/MAMP/htdocs

composer create-project laravel/laravel laravel-api --prefer-distNow by default you can get the angular app up and running using the following...
ng serve --open... but by default it uses http://localhost:4200 as the preview url, but we want to set the domain name ourselves for development. So instead input the following and it which will create the '/dist/' folder.
cd /Applications/MAMP/htdocs/angular-web

// Keep a note of this since we will be using it everytime we want to generate a preview
ng build --prod
Next setup the two localhost domains by editing the 'httpd.conf' file.
open -e /Applications/MAMP/conf/apache/httpd.confFor this I will use the following 2 domains 'angular-web.testing' and 'laravel-api.testing' so add the following.
NameVirtualHost *:80

<VirtualHost *:80>
    ServerName angular-web.testing
    DocumentRoot /Applications/MAMP/htdocs/angular-web/dist
    <Directory /Applications/MAMP/htdocs/angular-web/dist/>
        Options Indexes FollowSymLinks MultiViews
        AllowOverride All
        Order allow,deny
        allow from all
    </Directory>
</VirtualHost>

<VirtualHost *:80>
    ServerName laravel-api.testing
    DocumentRoot /Applications/MAMP/htdocs/laravel-api/public
    <Directory /Applications/MAMP/htdocs/laravel-api/public/>
        Options Indexes FollowSymLinks MultiViews
        AllowOverride All
        Order allow,deny
        allow from all
    </Directory>
</VirtualHost>
Then edit the 'hosts' file and add the two domains.
open -e /private/etc/hostsAnd add the following.
127.0.0.1 angular-web.testing
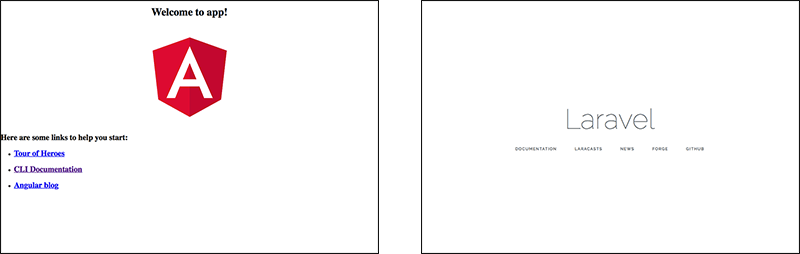
127.0.0.1 laravel-api.testingNow startup or restart MAMP making sure it's running php 7.1. And view the two staging domains. Fingers crossed you should see the following in your browser.
Now we are getting to the fun stuff and creating an example crud app. So first open the following file in your code editor '/Applications/MAMP/htdocs/angular-web/src/index.html' for this I am using Bootstrap 4 for the layout.
<!doctype html>
<html lang="en">
<head>
<!-- Required meta tags -->
<meta charset="utf-8">
<title>Angular and Laravel CRUD web app</title>
<meta name="viewport" content="width=device-width, initial-scale=1.0, maximum-scale=1.0, user-scalable=no">
<!-- Bootstrap CSS -->
<link rel="stylesheet" href="https://maxcdn.bootstrapcdn.com/bootstrap/4.0.0/css/bootstrap.min.css" integrity="sha384-Gn5384xqQ1aoWXA+058RXPxPg6fy4IWvTNh0E263XmFcJlSAwiGgFAW/dAiS6JXm" crossorigin="anonymous">
</head>
<body>
<app-root></app-root>
</body>
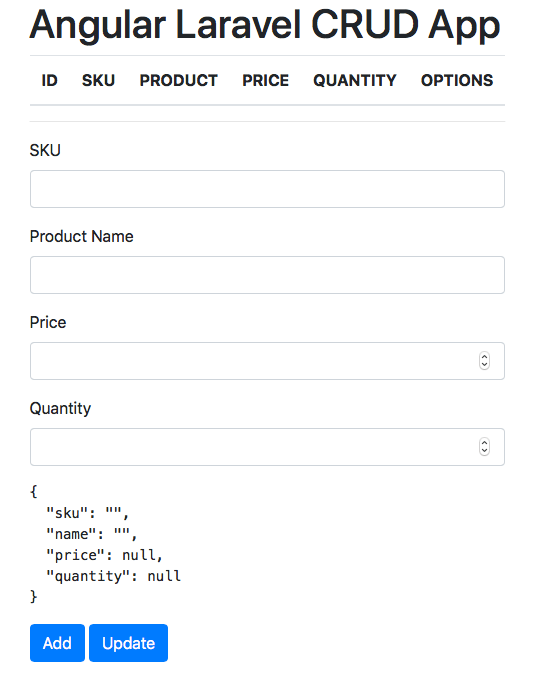
</html>Next edit the following file '/Applications/MAMP/htdocs/angular-web/src/app/app.component.html' and add the following which contains a table for outputting the Laravel api json and a form for editing the details.
<div class="container">
    <div class="row">
        <div class="col-xs-12">

            <h1>{{title}}</h1>

            <!-- Table to output data -->
            <table class="table table-striped">
                <thead>
                    <tr>
                        <th>ID</th>
                        <th>SKU</th>
                        <th>PRODUCT</th>
                        <th>PRICE</th>
                        <th>QUANTITY</th>
                        <th>OPTIONS</th>
                    </tr>
                </thead>
                <tbody>
                    <tr *ngFor="let product of products">
                        <td>{{ product.id }}</td>
                        <td>{{ product.sku }}</td>
                        <td>{{ product.name }}</td>
                        <td>{{ product.price }}</td>
                        <td>{{ product.quantity }}</td>
                        <td>
                            <button (click)="deleteProduct(product.id)" class="btn btn-danger">Delete</button>
                            <button (click)="showProduct(product.id)" class="btn btn-primary">Edit</button>
                        </td>
                    </tr>
                </tbody>
            </table>

            <hr />

            <!-- Form to add data -->
            <form [formGroup]="productForm" (ngSubmit)="storeProduct(productForm)">
                <div class="form-group">
                    <label for="sku">SKU</label>
                    <input type="text" class="form-control" name="sku" formControlName="sku">
                </div>
                <div class="form-group">
                    <label for="name">Product Name</label>
                    <input type="text" class="form-control" name="name" formControlName="name">
                </div>
                <div class="form-group">
                    <label for="price">Price</label>
                    <input type="number" class="form-control" name="price" min="0" max="99999" step=".01" formControlName="price">
                </div>
                <div class="form-group">
                    <label for="quantity">Quantity</label>
                    <input type="number" class="form-control" name="quantity" min="1" max="10" formControlName="quantity">
                </div>

                <!-- Output the data on input -->
                <pre>{{productForm.value | json}}</pre>

                <button type="submit" class="btn btn-primary">Add</button>
                <button type="button" (click)="putProduct(product.id)" class="btn btn-primary">Update</button>

            </form>

        </div>
    </div>
</div>
Now open '/Applications/MAMP/htdocs/angular-web/src/app/app.component.ts'.
import { Component } from '@angular/core';

@Component({
    selector: 'app-root',
    templateUrl: './app.component.html',
    styleUrls: ['./app.component.css']
})
export class AppComponent {
    title = 'Angular Laravel CRUD App';
}
Now lets see what is being output.
ng build --prodAnd preview in the browser 'http://angular-web.testing'.
Before we try to migrate any data there maybe the infamous 'Specified key was too long error'. So edit the following first to be safe - from my research it seems to relate to the MySQL being 5.6 instead of 5.7 which MAMP doesn't support.
open -e /Applications/MAMP/htdocs/laravel-api/app/Providers/AppServiceProvider.phpMake the following amend and add - ' Schema::defaultStringLength(191); '.
<?php

namespace App\Providers;

use Illuminate\Support\ServiceProvider;
use Illuminate\Support\Facades\Schema;

class AppServiceProvider extends ServiceProvider
{
    /**
     * Bootstrap any application services.
     *
     * @return void
     */
    public function boot()
    {
        // This is the important bit
        Schema::defaultStringLength(191);
    }

    /**
     * Register any application services.
     *
     * @return void
     */
    public function register()
    {
        //
    }
}
Okay that's sorted so first edit the '.env' and edit the database settings. Then create the database via whatever way you choose such as phpMyAdmin or Sequel Pro.
open -e /Applications/MAMP/htdocs/laravel-api/.envChange the settings. For this I am using MAMP's default settings.
DB_CONNECTION=mysql
DB_HOST=127.0.0.1
DB_PORT=3306
DB_DATABASE=angular_laravel_api
DB_USERNAME=root
DB_PASSWORD=root
Lets now create our example data and model.
php artisan make:model Product -mNow we are going to create the database so open the migration file we just created '/Applications/MAMP/htdocs/laravel-api/database/migrations ..._create_products_table'
<?php

use Illuminate\Support\Facades\Schema;
use Illuminate\Database\Schema\Blueprint;
use Illuminate\Database\Migrations\Migration;

class CreateProductsTable extends Migration
{
    /**
     * Run the migrations.
     *
     * @return void
     */
    public function up()
    {
        Schema::create('products', function (Blueprint $table) {
            $table->increments('id');
            $table->string('sku');
            $table->string('name');
            $table->float('price');
            $table->integer('quantity');
            $table->timestamps();
        });
    }

    /**
     * Reverse the migrations.
     *
     * @return void
     */
    public function down()
    {
        Schema::dropIfExists('products');
    }
}
Migrate the data to the database.
php artisan migrateNow edit the model '/Applications/MAMP/htdocs/laravel-api/app/Product.php' since we need to set $fillable property to stop the mass assignment exceptions.
<?php

namespace App;

use Illuminate\Database\Eloquent\Model;

class Product extends Model
{
    protected $fillable = ['sku', 'name', 'price', 'quantity'];
}
Now create the controller for our data.
// -- resource adds the default methods we will be using in the controller
php artisan make:controller ProductController --resource
Lets open the file to control the data api requests '/Applications/MAMP/htdocs/laravel-api/app/Http/Controllers/ProductController.php'.
<?php

namespace App\Http\Controllers;

use App\Product;
use Illuminate\Http\Request;

class ProductController extends Controller
{

    public function index()
    {
        // List all the products
        return Product::get();
    }

    public function store(Request $request)
    {
        // Create new product
        $product = new Product();
        $product->sku = $request->sku;
        $product->name = $request->name;
        $product->price = $request->price;
        $product->quantity = $request->quantity;
        $product->save();
    }

    public function show($id)
    {
        // Show single product
        return Product::find($id);
    }

    public function update(Request $request, $id)
    {
        // Update the Product
        if ($id != null) {
            Product::where('id', $id)->update($request->all());
        }
    }

    public function destroy($id)
    {
        // Delete the Product
        if ($id != null) {
            $product = Product::find($id);
            $product->delete();
        }
    }
}
Now the last thing we need to change for laravel app is the api routes based in '/Applications/MAMP/htdocs/laravel-api/routes/api.php'.
<?php

use Illuminate\Http\Request;

// Get list of Products
Route::get('products','ProductController@index');

// Get specific Product
Route::get('product/{id}','ProductController@show');

// Delete a Product
Route::delete('product/{id}','ProductController@destroy');

// Update existing Product
Route::put('product/{id}','ProductController@update');

// Create new Product
Route::post('product','ProductController@store');There was an issue when I started testing locally when all my rest api calls were being blocked with the dreaded 'no access control allow origin header is present on the requested resource' so here is the solution I found. If you are testing via staging then you can skip this bit.
Create a new file with the following code '/Applications/MAMP/htdocs/laravel-api/app/Http/Middleware/Cors.php'.
<?php

namespace App\Http\Middleware;

use Closure;

class Cors {

    /**
     * Handle an incoming request.
     *
     * @param  \Illuminate\Http\Request  $request
     * @param  \Closure  $next
     * @return mixed
     */
    public function handle($request, Closure $next) {

        return $next($request)
          ->header('Access-Control-Allow-Origin', '*')
          ->header('Access-Control-Allow-Methods', 'GET, POST, PUT, DELETE, OPTIONS')
          ->header('Access-Control-Allow-Headers',' Origin, Content-Type, Accept, Authorization, X-Request-With')
          ->header('Access-Control-Allow-Credentials',' true');
    }
}
Then open the following file ' /Applications/MAMP/htdocs/laravel-api/app/Http/Kernel.php ' add the following '\App\Http\Middleware\Cors::class,'.
protected $middleware = [
        \Illuminate\Foundation\Http\Middleware\CheckForMaintenanceMode::class,
        \Illuminate\Foundation\Http\Middleware\ValidatePostSize::class,
        \App\Http\Middleware\TrimStrings::class,
        \Illuminate\Foundation\Http\Middleware\ConvertEmptyStringsToNull::class,
        \App\Http\Middleware\TrustProxies::class,
        \App\Http\Middleware\Cors::class,//cors added here
];Now the real magic the CRUD calls via angular. Open the file ' /Applications/MAMP/htdocs/angular-web/src/app/app.module.ts ' and add the following.
import { BrowserModule } from '@angular/platform-browser';
import { NgModule } from '@angular/core';
import { ReactiveFormsModule } from "@angular/forms";
import { HttpClientModule } from '@angular/common/http';
import { Observable } from "rxjs/Observable";
import { AppComponent } from './app.component';

@NgModule({
    declarations: [
        AppComponent
    ],
    imports: [
        BrowserModule,
        ReactiveFormsModule,
        HttpClientModule
    ],
    providers: [AppComponent],
    bootstrap: [AppComponent]
})

export class AppModule {
}
Then edit '/Applications/MAMP/htdocs/angular-web/src/app/app.component.ts' and add the following.
import { Component, OnInit, Injectable } from '@angular/core';
import { HttpClient } from '@angular/common/http';
import { FormGroup, FormControl, FormArray, NgForm } from '@angular/forms';

@Component({
    selector: 'app-root',
    templateUrl: './app.component.html',
    styleUrls: ['./app.component.css']
})

@Injectable()
export class AppComponent implements OnInit {
    title = 'Angular Laravel CRUD App';

    private productForm: FormGroup;
    product: any;
    products: any;

    constructor(private http: HttpClient) {
        this.getProducts();
    }

    ngOnInit() {
        this.productForm = new FormGroup({
            'sku': new FormControl(),
            'name': new FormControl(),
            'price': new FormControl(),
            'quantity': new FormControl()
        });
    }

    // Add a New Product
    storeProduct(productForm: NgForm) {
        // console.log('Form successful submit.');
        // console.log(productForm.value);

        this.http.post('http://laravel-api.testing/api/product', productForm.value).subscribe(res => {
            this.getProducts();
            productForm.reset();
        }, err => {
            console.log('Error occured');
        });
    }

    getProducts() {
        // console.log('Get Products and Update Table');
        return this.http.get('http://laravel-api.testing/api/products').subscribe(products => {
            this.products = products;
        });
    }

    showProduct(id) {
        console.log('Get Product ' + id);
        return this.http.get('http://laravel-api.testing/api/product/' + id).subscribe(product => {
            this.product = product;
            this.productForm.patchValue({
                id: this.product.id,
                sku: this.product.sku,
                name: this.product.name,
                price: this.product.price,
                quantity: this.product.quantity
            });
        });
    }

    deleteProduct(id) {
        console.log('Delete Product id ' + id);

        this.http.delete('http://laravel-api.testing/api/product/' + id).subscribe(res => {
            console.log('Product Deleted and refresh Table');
            this.getProducts();
        }, err => {
            console.log('Error occured');
        });
    }

    putProduct(id) {
        console.log('Update Product id ' + id);

        this.http.put('http://laravel-api.testing/api/product/' + id, this.productForm.value).subscribe(res => {
            console.log('Product Updated and refresh table');
            this.getProducts();
        }, err => {
            console.log('Error occured');
        });

    }
}
Now back in the terminal input then refresh the url http://angular-web.testing and get testing!
ng build --proI am hoping this has been a helpful start if you are just learning, plus I have tried my best to leave as many notes in the code. One thing to note - best practise would be to intergrate a token based system when calling rest api calls in laravel to protect direct access.

07 Oct, 2016

22 Nov, 2014

24 Nov, 2013

I am a Full-stack Developer who also started delving into the world of UX/UI Design a few years back. I blog and tweet to hopefully share a little bit of knowledge that can help others around the web. Thanks for stopping by!
Follow
11 Jul, 2023

21 Jun, 2023

Views: 167,080

Views: 40,659

Views: 37,599

Views: 33,998


